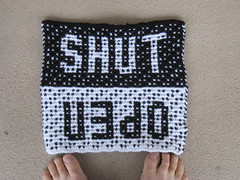
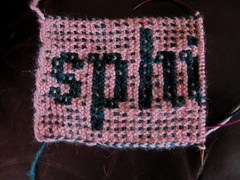
I think I posted about this before, but here is a font I created on the FontStruct website called Mosaic4way. It’s a font you can use to create writing in mosaic knitting. I call it Mosaic4Way because you can knit from the alphabet in any direction. Three of the directions (top, bottom, left) are depicted below.
Click on the picture below (or the following link) to be taken to the page where the font is hosted on Fonstruct. You can download it for free and use it freely for non-commercial purposes. You should give me credit if you share any patterns that use it, and ask permission if you want to use it for commercial purposes.
Here's a screen shot of all the characters in the font (click to get bigger sizes). I can't remember, but I think I did all the Western European letters, so there is plenty of accented goodness, but Eastern European alphabets users are likely out of luck. Hey, but there is a Euro symbol!
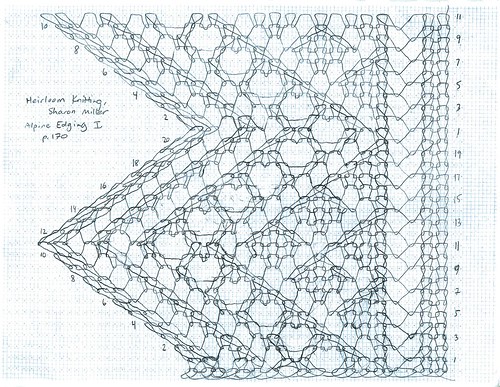
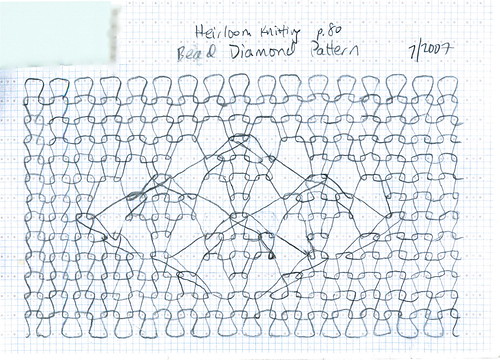
It took a lot of practice and exploration for me to be able to do that latest, most detailed diagram.
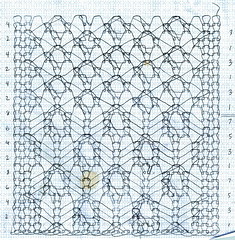
About two years ago I was trying to figure out how to illustrate knitting stitch patterns in the old-school way, where it's all hand-drawn, showing each twist and turn of the knitted yarn. I did develop one method, shown here, that's most suitable for lace knitting, and even for knitted lace, where the shaping is done on each row.
There's a whole lot of idealizing and simplifying involved, but this kind of illustration is at least "topologically" accurate.
The key for me was designing and printing a type of graph paper that represents the approximate 3:4 height-to-width ratio of knitted stitches. Then I had to figure out the rather weird things that yarn overs do to the proportions of the knitted loops.
These illustrations show how an ideal knitted fabric would look when projected on a screen, that is, all of the three-dimensional quality of the fabric is lost. There's no information here about whether stitches are knits or purls nor whether the decreases are right- or left-leaning, only where the yarn overs and decreases are, and how the columns (wales) of stitches slant and flow into each other.
Still, they are much more faithful to the look of the knitted fabric than anything I'd been able to do up to that point. I could even knit from them, but I'm weird that way.
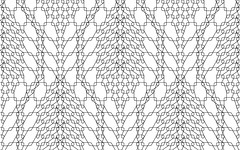
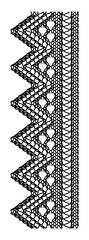
Eventually I started to do this on a computer, like the third illustration here. Still, I like the hand drawn ones because of the roughness. You'll see more examples of this kind of diagram in my Flickr set "Knitting Diagrams."
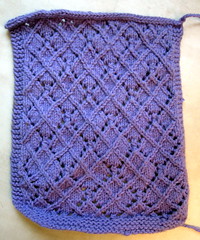
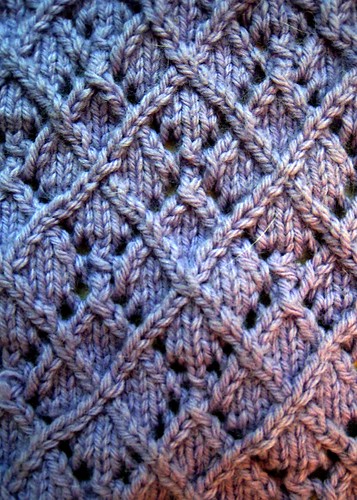
One of my beloved commenters requested a stitch pattern for the "Lace Twist-Stitch 'Argyle' Pattern" (please, for the love of Pete, think of a better name). I created this pattern a while ago, and knitted it from a rough diagram whose mysterious symbols were known only to me. With this post and the accompanying PDF files (see below) I hope I've given the instructions in a shape that other people can follow.
The goal in designing this fabric was to see if I could line up the twist stitches with the yarnovers in an interesting and pleasing way, using texture to give an argyle effect that's usually given with color. (Somebody, please, make some socks from this pattern!) To get the columns of stitches to line up right, I had to do some fancy twist-stitches and twist-decreases, so I made them up. I've actually used them for other fabrics, such as the Double Lattice Pattern, which see.
In addition to using twist stitches of my own unvention, of course I use idiosyncratic charting methods. (What would the world be with only five thousand charting methods?) I use only one square for the symbol for twist stitches, since to me it shows better how the stitch columns line up in the fabric. Diagramming them this way definitely made designing the fabric easier. If it helps to keep track, the stitch key's right column shows for all of the chart symbols the number of loops used from the row before and the number of loops that result from working each symbol.
Stitch-Pattern Diagram
Close-up Fabric Photograph
Written-out Directions
Cast on a multiple of 12 stitches plus 1. Stitch count varies. Stitch abbreviations are explained in the stitch key below.
Slip-Slip-Knit (ssk): Slip 2 as if to knit, insert left needle into front of stitches just slipped, and knit the 2 stitches together.
2-1
Slip 1 as if to knit, knit 2-together, pass slipped stitch over the stitch just made (sl1-k2tog-psso).
3-1
Right Twist (RT): Knit 2-together, then knit again into the first stitch on the left needle before withdrawing left needle.
2-2
Left Twist (LT): Slip 2 as if to knit, return to left needle, Knit 1-back into 2nd stitch from end of left needle, then Knit 2-together through back loops before withdrawing left needle.
2-2
Right 3-3 Twist (RT3):Slip 2 as if to knit, then transfer back to left needle by inserting left needle from right to left into both stitches at once and withdrawing the right needle. (Counting from the end of the left needle, the stitch order was 1-2-3, and now it's 2-1-3.) Knit 3 together, yarn over, knit 2 together before withdrawing left needle.
3-3
Left 3-3 Twist (LT3): Slip 1 as if to knit, slip 2 as if to knit 2-together. Return the 3 stitches to the left needle, then knit 2-together through the back loops of the 2nd and 3rd stitches on the left needle, yarn over, then knit 3 together through the back loops of all three stitches before withdrawing left needle.
3-3
Right-Twist Decrease (RT-dec): Slip 2 as if to knit, then transfer back to left needle by inserting left needle from right to left into both stitches at once and withdrawing the right needle. (Counting from the end of the left needle, the stitch order was 1-2-3, and now it's 2-1-3.) Knit 3 together, then knit 2 together before withdrawing left needle.
3-2
Left Twist Decrease (LT-dec): Slip 1 as if to knit, slip 2 as if to knit 2-together. Return the 3 stitches to the left needle, then knit 2 together through the back loops of the 2nd and 3rd stitches on the left needle, then knit 3-together through the back loops of all three stitches before withdrawing left needle.

![Reblog this post [with Zemanta]](http://img.zemanta.com/reblog_e.png?x-id=867fc398-6c88-4636-b006-4c7f5ec2d940)



![Reblog this post [with Zemanta]](http://img.zemanta.com/reblog_e.png?x-id=3bb82b3a-3e52-4553-aca7-b76e2047fc5e)



![Reblog this post [with Zemanta]](http://img.zemanta.com/reblog_e.png?x-id=af749ed8-7bc9-44be-98f0-1b741f8a3438)
